What Is the Blue 3.5 Mm Jack Port
Z7_3054ICK0KGTE30AQO5O3KA30N0
hp-concentra-wrapper-portlet
![]() Actions
Actions
HP PCs - Resolving Headphones and Headset Problems (Windows 8)
This document applies to HP and Compaq computers with Windows 8.
This document provides solutions to a variety of problems that can occur when using headphones and headsets.
note:If you are not using the latest version of Windows 8, some graphics and information in this document may vary. You can get the latest version from the Microsoft Store.
Before you begin
Audio devices might need to be disconnected from the computer during the troubleshooting process.
caution:Always follow manufacturer instructions for disconnecting USB devices from the computer. Some USB devices must be turned off and/or ejected before they are disconnected from the computer. Some other USB devices support the Windows Safely Remove Hardware feature.
Make sure Windows can produce sound from the speakers before using this article. If the computer cannot play sound from the speakers, choose one of the HP support documents below to resolve that issue:
Checking the headphones or headset
Check the following issues to troubleshoot headphones or a headset:
-
Software: If the device came with software, make sure it is installed properly and is compatible with Windows 8.
-
Power: If the device operates on battery power, make sure the batteries are correctly seated and are functional. If the device operates on external power, make sure all the power connections are secure and the power cord is connected to a power source.
-
Volume: If the device has a volume control, make sure it is turned up halfway.
-
Connection: Connect and disconnect the device from the computer port.
-
USB connector: If the device uses a USB connector, disconnect and reconnect the USB connector to the computer. If the computer still does not recognize the device, try plugging the USB connector into a different port on the computer.
-
Jack connector: If the device uses a jack connector, disconnect and reconnect the jack connector to the computer. Most importantly, make sure the jack connector type you are using is compatible with your computer.
Two types of headphone connectors are available on HP computers. One supports only sound to the headphones, and the other supports sound to the headphones and the use of a microphone. The connectors are marked with symbols next them.
-
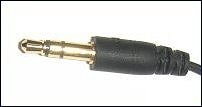
Connectors on the computer marked with only a headset
 , support output sound only and work with a standard three-pin headphone or a four-pin headphone, for sound.
 Figure : Standard three-pin plug
-
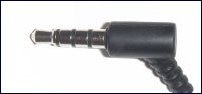
Connectors on the computer marked with a headset with a microphone
 support sound and the use of a microphone when used with a headset with a four-pin plug and a microphone.
 Figure : Four-pin plug
To hear sound, either plug can be used with either connector. Using a four-pin plug that is capable of supporting a microphone in a three-pin connector allows sound to be heard, but the microphone does not work because the computer's three-pin connector does not support a microphone.
note:
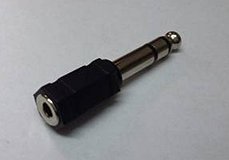
Some devices use a mini jack connector. This smaller connector is not compatible with HP computers and you might need an adaptor in order to use your device. Also, using an adaptor might affect the quality of the audio. This does not mean that your computer has a problem.
Figure : Example of a jack adapter
-
-
-
Make sure that the jack connector is connected to the correct port:
Digital audio jack ports
Analog audio jack ports are color coded. Common color coding is shown below, however, colors can vary.
-
Microphone jack port
-
Headphones jack port

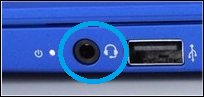
Newer computers might also have a headset (combination headphones and microphone) port. The headset port has a headset
 icon next to the port. This port can be used for headsets, headphones, and microphones.
Gray, Black and Orange (side, rear, c/sub) are for speakers.

Pink (mic) is for microphones.
Green (out) is for headphones.
Blue (in) is for audio input (like DVD players, tape players, and other sound producing devices).
-
-
Connect the headphones or headset to an alternative device (such as, another computer) and try to use it.
-
If the device functions correctly when connected to the alternative device, then the problem might be a driver or computer recognition issue. Continue to the next section to check for an update to the audio driver.
-
If the device does not function correctly when connected to the alternative device, then the device might be malfunctioning.
-
Updating the audio driver
If the headphones or headset device is not functioning with your computer, updating the audio driver can sometimes resolve the problem. Follow these steps to check for and install audio driver updates:
-
Connect to the Internet.
-
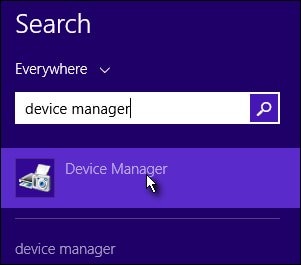
From the Start screen, type device manager to open the Search charm, then select Device Manager from the search results.
Figure : Device Manager search results
-
Double-click Sound, video and game controllers.
-
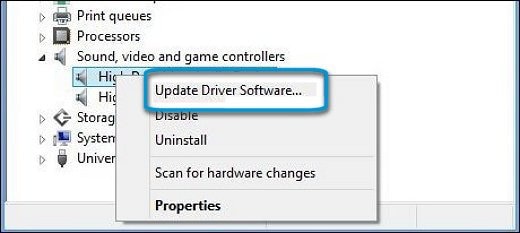
Right-click the name of the sound hardware and select Update Driver Software.
Figure : Update Driver Software option in Device Manager
-
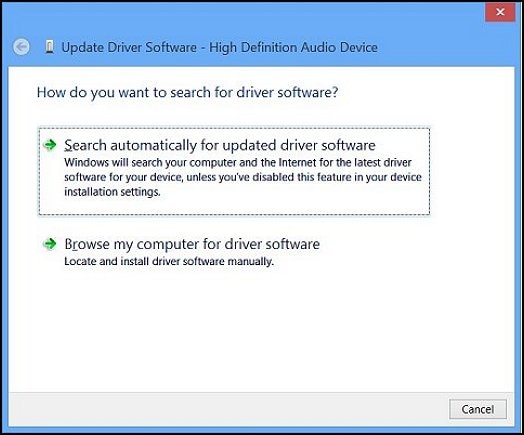
Click Search automatically for updated driver software and wait for Windows to update the driver software.
Figure : Updated Driver Software: Search automatically for updated driver software
-
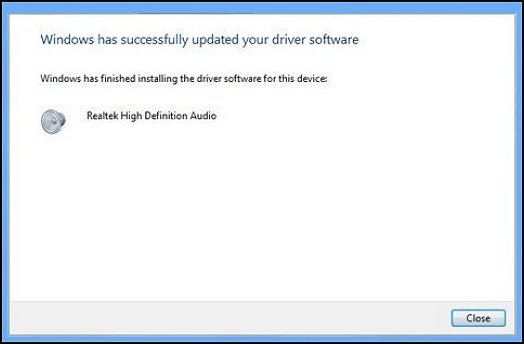
Windows checks to see if updated driver software is available.
If an update is available, let Windows install the update.
-
When the update is installed successfully, close the Updater and test the device.
Figure : Windows has successfully updated your driver software
-
If there was no update available or updating the driver did not resolve the issue, continue to the next section.
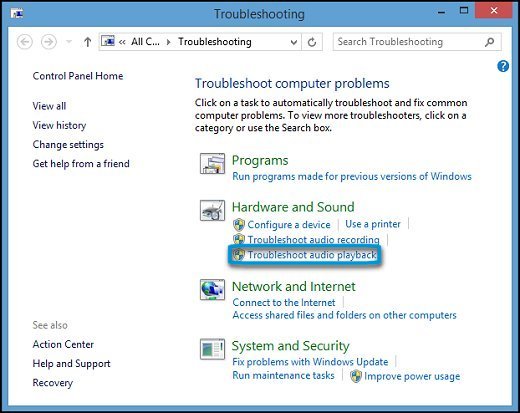
Using the Windows troubleshooting tool
The troubleshooting tool can fix common problems with audio playback. Follow these steps to use the Troubleshooting tool:
-
From the Start screen, type troubleshooting to open the Search charm, then select Troubleshooting from the search results.
Figure : Troubleshooting search results

-
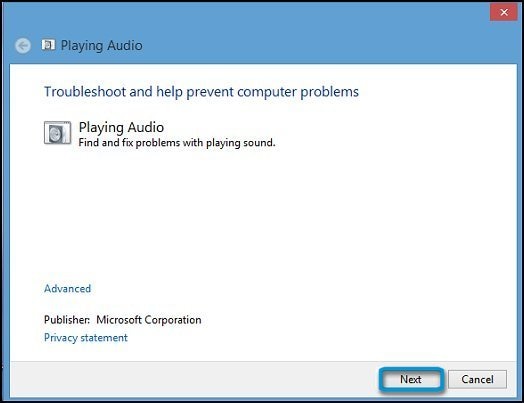
Under Hardware and Sound, click Troubleshoot audio playback.
Figure : Troubleshoot audio playback
-
The Playing Audio window opens. Click Next.
Figure : Playing Audio window
-
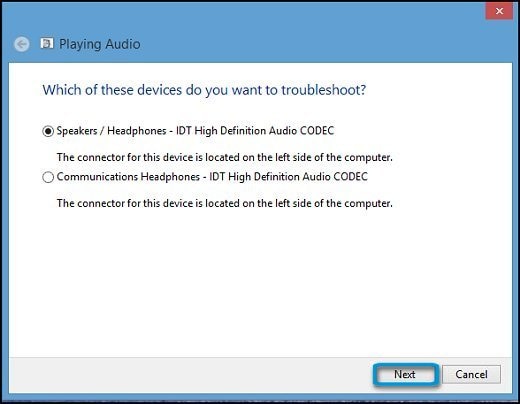
A new window opens. Select the device you want to troubleshoot. Then click Next and follow the on-screen instructions.
Figure : Select device to troubleshoot
If a recommended action displays, select Apply this fix or Skip this step to continue to search for other problems. If the problem has not been resolved, continue to the next section of this article.
Checking the sound settings
There are a number of options in Windows sound settings that need to be configured so that the computer recognizes and works with the headphones or headset. Use these steps to modify the sound configuration as necessary for your device.
Step 1: Make sure the device is recognized by the computer
-
Connect the device to the computer.
-
From the Start screen, type sound to open the Search charm, then select Sound from the search results.
Figure : Sound search results

The Sound window opens.
-
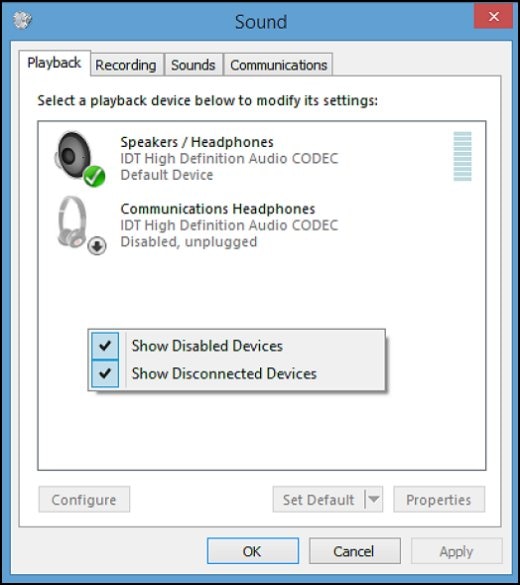
Click the Playback tab in the Sound window.
Figure : Playback tab

-
Right-click an empty area of the Sound window.
-
Click Show Disabled Devices and Show Disconnected Devices.
Figure : Disabled and disconnected devices shown in the Playback tab
-
If the device is listed as "Currently unavailable" or "Not plugged in," disconnect it, then reconnect it to the port. If the device is still not detected, refer to the Check the headphones or headset section of this article to check the device and connections.
-
Test the device by sending a signal from the sound source. For example, play an .mp3 music file to test the headphones or speak into the microphone to test a headset.
Look at the gray bars next to the device name on the Playback tab:
-
If the gray bars next to the device name change to green, the device is active and an audio signal is passing through the line-out port. The issue should now be resolved. However, you might still want to make sure the device is set as the default device by leaving the Playback tab open, and using the Step 2: Setting the default device section of this article.
-
If the bars remain gray and inactive, the computer is not recognizing a signal. Leave the Playback tab open and refer to the Step 2: Setting the default device section of this article.
Figure : Sound window with Playback tab showing a detected signal for the device

-
Step 2: Enable and/or set the default playback device
The headphones or headset you want to use might need to be enabled and/or set as the default device. Follow these steps:
-
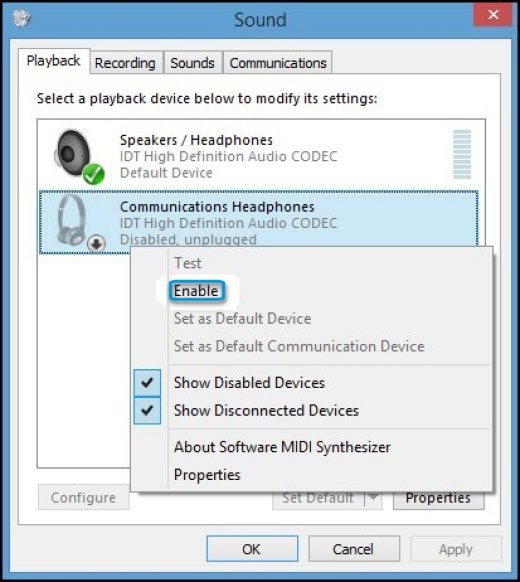
From the Playback tab of the sound window select the device that you want to use (there could be one or more devices).
-
If the device you want to use contains a small circle with an arrow pointing down, the device is disabled. To enable the device, right-click the device name and select Enable.
Figure : Enable selection in the Sound window
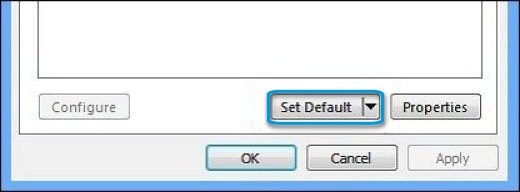
-
Click Set Default to make this the default headset, then click Apply.
Figure : Set Default option in the Sound window
Step 3: Check the volume and mute settings
The volume for the headphones or headset might be muted or turned down, making the computer appear unresponsive to the device. Use these steps to check the volume levels for the audio device.
note:Disconnect all sound devices before performing this step.
-
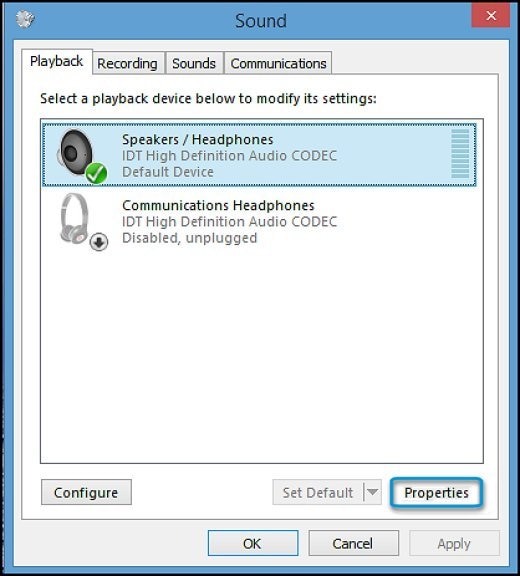
From the Playback tab of the sound window, select an active device, then click Properties.
The Properties window opens.
Figure : Playback tab in Sound window
-
Click the Levels tab.
Figure : Levels tab in Properties window

-
If the Mute
 button is enabled, click it to turn off mute. The mute button should show as a blue speaker
  .
. -
Raise the Speakers volume to 50 or higher.
- Click OK.
Troubleshooting headsets
Use this section to diagnose and resolve headset compatibility and configuration issues.
Check for computer port compatibility
Headsets with a single jack connector are only compatible with computers that have headset ports. A headset port has a headset icon next to it. If you have a headset with a single jack connector, and your computer does not have a headset port, then the headset is not compatible with your computer.
Headsets with two jack connectors are only compatible with computers that have both a headphone and microphone port. If you have a computer that only has a headset port (which has a headset icon next to it), then your headset is not compatible with your computer.
note:You might be able to find an adapter cable which can make your headset and computer compatible. Check with a local computer store or online. Also, using an adaptor might affect the audio quality. This does not mean that your computer has a problem.
Sound comes from both the headset and speakers when using a headset microphone
If you hear sound from both the headset and from speakers when using a headset microphone, then your computer is configured to listen to the headset microphone through the speakers. Follow these steps to resolve the issue:
-
From the Start screen, type sound to open the Search charm, then select Sound from the search results.
Figure : Sound search results
The Sound window opens.
-
Click the Recording tab.
-
Select the microphone, then click Properties.
Figure : Recording tab in the Sound window

-
In the Microphone properties, click the Listen tab.
-
Remove the check next to Listen to this device, then click Apply.
Figure : Microphone Properties window

Testing the headphones using HP PC Hardware Diagnostics (UEFI)
You can also use the HP PC Hardware Diagnostics (UEFI) to test the audio hardware components in your computer. Use the following steps to test your headphones or headset.
note:Before you run this test, make sure you are using the correct headphones or headset jack connector. Refer to the Checking the headphones or headset section of this document.
-
Shut the computer off completely.
-
Turn on the computer and immediately press the F2 key repeatedly, about once every second.
The HP PC Hardware Diagnostics (UEFI) home page displays.
-
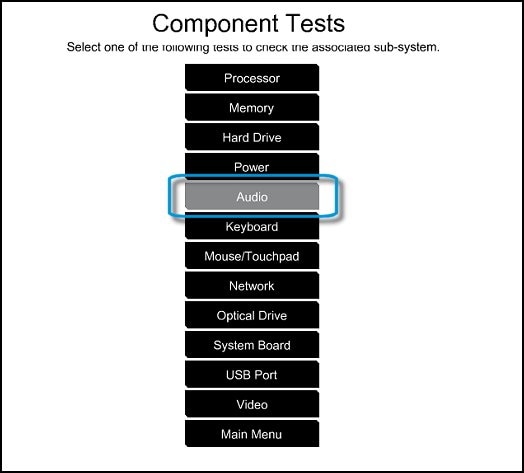
Select Component Tests.
Figure : Selecting the Component Tests

-
On the Component Tests menu, select Audio.
note:
If your HP PC Hardware Diagnostics (UEFI) does not have the Audio test, it is an older version. To upgrade to the latest version, click here for Notebooks.
Figure : Selecting the Audio tests
-
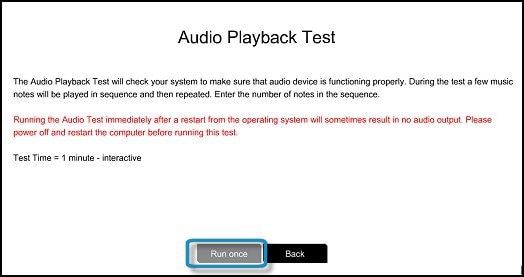
On the Audio Playback Test, select Run Once.
Figure : Starting the Audio test
-
Select Headphone to begin the test.
note:
Make sure to connect your headphone or headset; otherwise the test will not run.
Figure : Running the Audio Playback test

-
During the test, a few music notes will be played in sequence and then repeated. Select the number of notes you hear in the sequence.
If you hear no sound, select No sound .
Figure : Entering the number of notes you hear

-
If the test fails, a failure ID will be provided. Have the failure ID available when contacting HP Support.
Troubleshooting problems with USB ports
Sometimes USB connected headphones and headset do not work because of a problem with the USB ports on the computer. If you have not been able to resolve the audio device problem after performing the steps in this article, see Troubleshooting USB Connections (Windows 8).
What Is the Blue 3.5 Mm Jack Port
Source: https://support.hp.com/us-en/document/c04474731
0 Response to "What Is the Blue 3.5 Mm Jack Port"
Post a Comment